


Tap into DeFi's most capital efficient money market.
Dolomite is the only lending and borrowing platform that can support over 1,000 unique assets.
TOTAL SUPPLIED
TOTAL BORROWED
TOTAL TRADE VOLUME


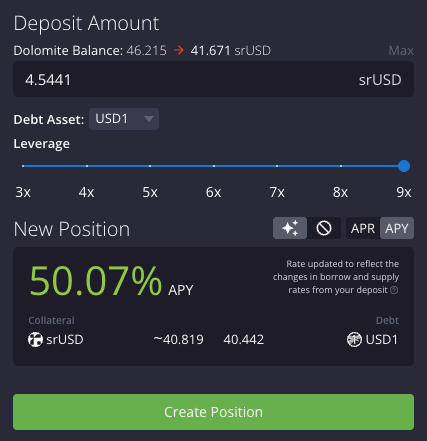
Looped srUSD
7X
Ethereum
RISK
%
APY
%
30 DAY AVG.


Looped gmLINK-USD
4X
Arbitrum
RISK
%
APY
%
30 DAY AVG.

Looped gmETH
5X
Arbitrum
RISK
%
APY
%
30 DAY AVG.


Looped oriBGT
5X
Berachain
%
APY
%
30 DAY AVG.
Features
Get the most out of your assets
Lend, borrow, and earn on the most comprehensive DeFi platform. Dolomite lets you maximize yield, access liquidity, and stay in full control of your assets.
BORROW
Flexible leverage, made simple.
Dolomite lets you borrow against 100+ assets while keeping every position separate and secure. If one position changes, the rest stay protected, so you’re always in control.

DOLO
Smart token design for a stronger ecosystem.
DOLO, veDOLO, and oDOLO work together to fuel Dolomite’s growth. From community rewards to protocol-owned liquidity and governance participation, the system turns every interaction into aligned, compounding value for the entire network.

ZAP
Trade and manage borrows in one click.
Zap integrates DEX aggregators and protocol routing directly into Dolomite, letting you swap, loop, hedge, or repay inside your Borrow Positions. Every action, from opening a position to rebalancing collateral, happens in one seamless transaction.

STRATEGIES
Pre-built yield strategies optimized for every goal
Dolomite Strategies let you deploy optimized positions for yield, rewards, or exposure, no manual setup needed.

Curated strategies
Deploy curated strategies designed by Dolomite and ecosystem partners, each balancing yield potential with varying risk levels.


Effortless strategy management
Track all open strategy positions in one place. Claim rewards, review performance, or close positions instantly from your dashboard.


Smart filters & discovery
Find the right strategy for your goals. Sort by APR, risk level, or chain, and use tags to identify yield sources or strategy types before deploying.


SECURITY
Secure to its core
Dolomite’s contracts are audited by six leading firms and tested to 100% coverage. Every line of code is designed for transparency, resilience, and trust.
Multi-Layer
audits
audits
Dolomite’s core and module contracts have undergone six independent audits by Zeppelin Solutions, Bramah Systems, SECBIT Labs, Cyfrin, Zokyo, and Guardian. Every production contract maintains 100% line, statement, and branch test coverage.
Immutable by
design
design
The protocol’s dual-repository structure, Core and Modules, separates immutable architecture from active development, minimizing risk, isolating upgrades, and evolves new integrations without compromising security.
Community-driven
protection
protection
Dolomite’s open bug bounty program rewards responsible disclosures under the OWASP risk framework. Users who submit vulnerabilities shall receive recognition and monetary rewards.

AUDITED BY
AUDITED BY


PARTNERS
Trusted by industry leaders
Since 2022, Dolomite has been backed by leading venture funds and integrated with top DeFi and infra partners driving the next generation of on-chain markets.


BUILD ON DOLOMITE
Power your protocol with yield and liquidity
Access asset-level yields, and advanced features like isolated positions, composable borrowing, and integrated swaps.
Immutable and future-proof
Composability at the core
Rights-retaining integration


GET STARTED
